 After months of research and then a lot of deal-seeking, we finally landed on the best, safest way for our little Cyclones to ride on the bus. But first, here’s a look at all the top three considerations.
RideSafer Car Seat Vest | Price: $145
Our friend Martine recommended this option to us as she frequently uses it when she travels with her young family. There are a lot of things to love: it’s portable, small and provides that super secure five-point coverage. I really liked the idea of this solution as we’d be able to use it other places besides the bus.
We really couldn’t go this route as no matter what adjustments we considered, we didn’t have a shoulder belt or a tether system—one of which is really required for accurate installation.
Note: There are other solutions like this made for commercial use or for special needs children. Those had similar installation issues and were often more expensive.
New Shoulder Belts | Price $40
Since the lack of a shoulder belt seemed to rule out a lot of options, I started looking into purchasing new seat belts. Generally, they aren’t horribly expensive and we could definitely have my dad help secure the bottom and side screws. Ultimately, I moved away from this option as it was only a partial solution. Even after all of this work, we’d still need to purchase something like the RideSafer vest or continue transferring in our car seats and boosters with intricate top-tethering solutions.
SafeGuard Standard Star System | Price $125
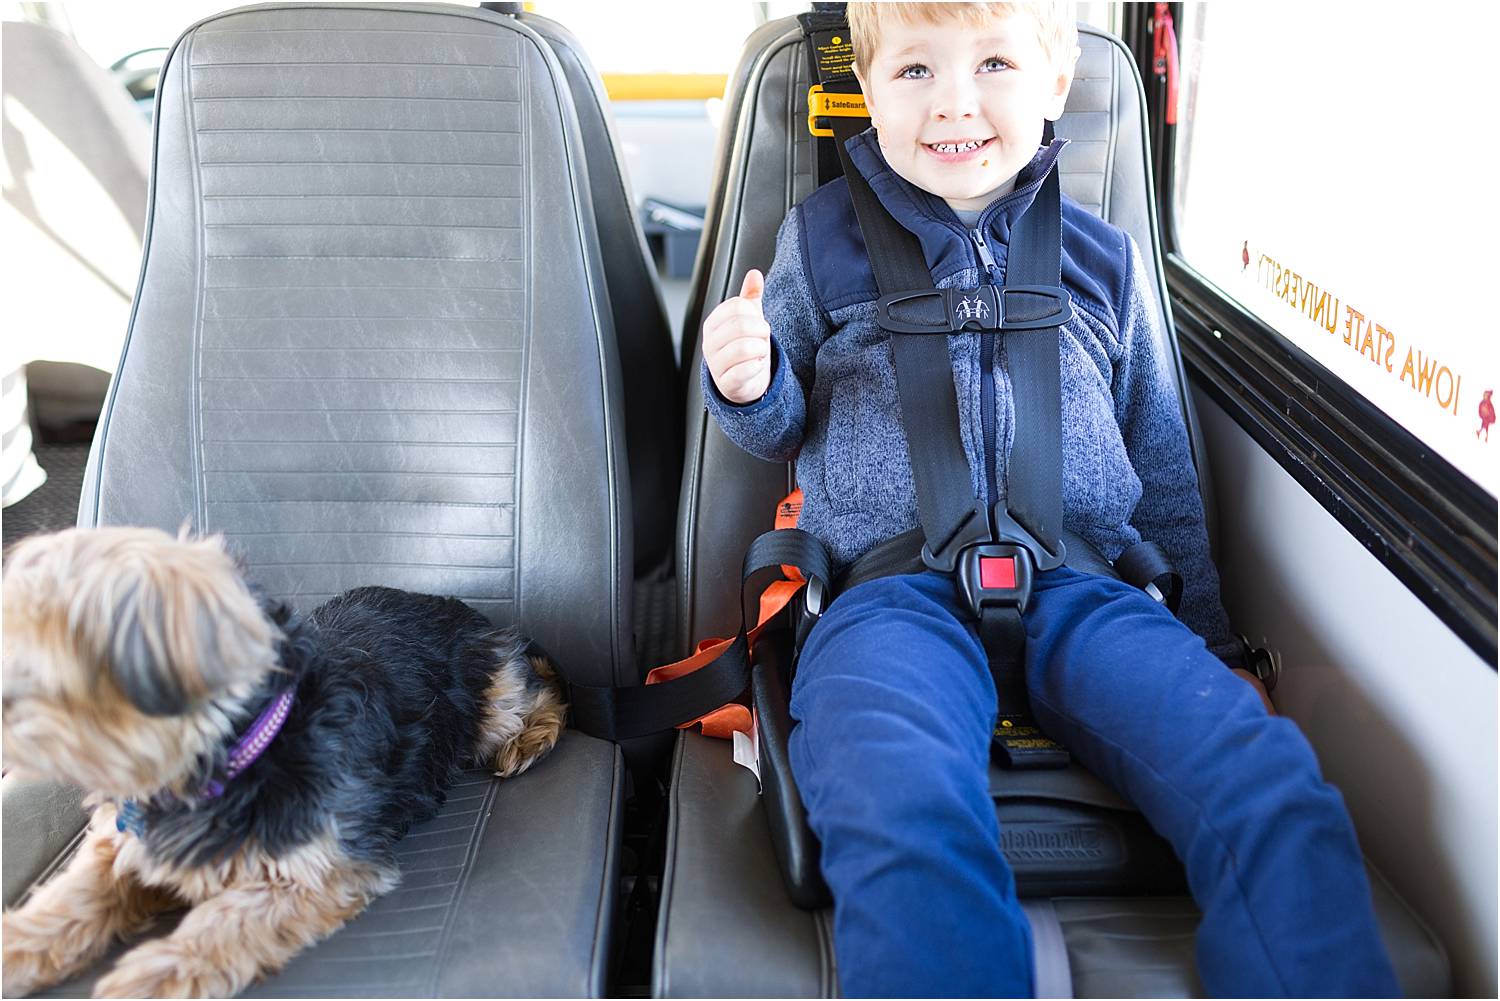
These came up in my search relatively early, but the red tape to acquire them put them on the lower end of the consideration set for quite a while. What I love is that these are made for school buses and are able to provide five-point harness safety without any additional belts or equipment. They adjust to fit children 25 to 65 pounds and up to 57 inches tall. Ultimately, this is what we purchased. If you’re considering the same, here are two main things you should know.
Acquisition
Because these are designed for buses, their distribution is exclusively through certified dealers or school bus dealers. I inadvertently learned the markup for these is much higher than MRSP, so I sent well over a dozen emails to distributors to find the most competitive price. The folks at Midwest Transit Equipment had a low rate and additional rebates to help bring down the price point, and were so helpful with all of my questions and concerns along the way as well. (Thanks Tyler!)

Installation
The seats come in their own box, each about a foot square and maybe six inches tall—super low profile. There are two straps that feed between the bottom seat and the seat back of the bus. It took us a lot of time and trial and error to figure out the best way to do this. For the first of four we installed, we removed the entire seat. For later seats, we were able to find the path through the upholstery without unbolting anything! All in, it took us two hours to install four seats.
Once the main straps feed between the seat, there are two straps that connect behind the seat back and a third that wraps around the bottom seat. Once you place your kiddo in the chair, all the adjustments are super quick and easy for anyone who has used a traditional car seat. Best of all, now we have an easy way for the kids to buckle up and go with the peace of mind that we’ll be safe if any accident should happen.
One caveat: I was hoping for something that could be quickly uninstalled for adults to hop into the seats if needed. Due to the complicated install, these won’t be going anywhere anytime soon. However, the seats are low profile and cushy enough that it’s not the end of the world if you do have to sit on top of the car seat for a short ride.